Welcome to NoteSpark AI. In this tutorial, we will show you how to generate your notes by recording lecture audio. If you are in class or listening to a lecture, you can use NoteSpark AI to generate your notes by recording the lecture audio.
Before You Get Started
Before you get started, make sure you have a microphone in your device and a stable internet connection to upload your audio. You can use your laptop or mobile phone to record your lecture audio.
Subscriber Only Feature
This feature is available exclusively for NoteSpark AI subscribers and users in free trial.
Record Lecture Audio and Generate Notes
- Go to the NoteSpark AI dashboard.
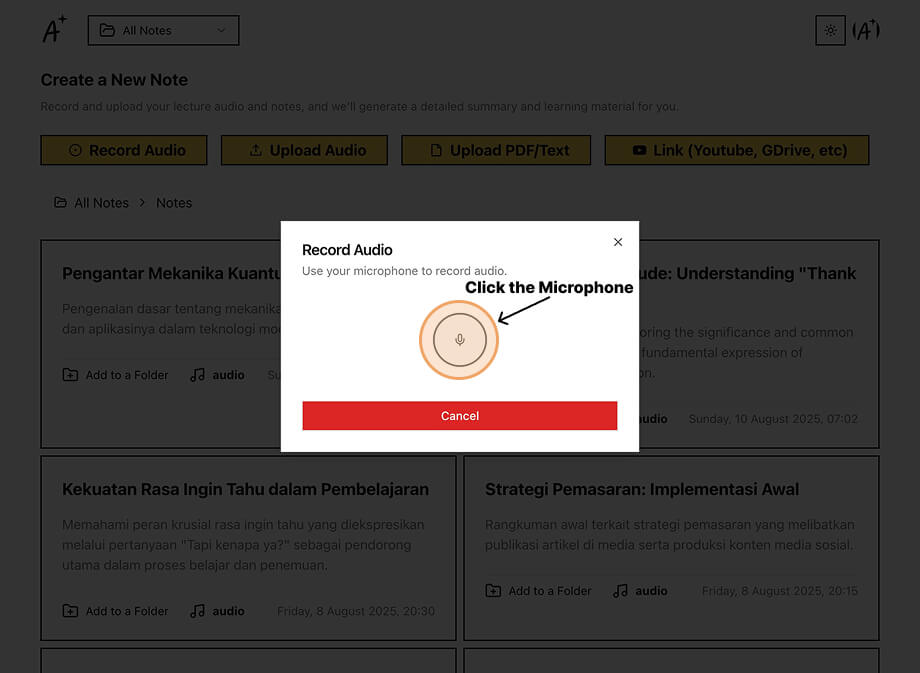
- Click on the "Record Audio" button.

- You will be shown a popup to record your lecture audio. Click the Microphone button to start recording.
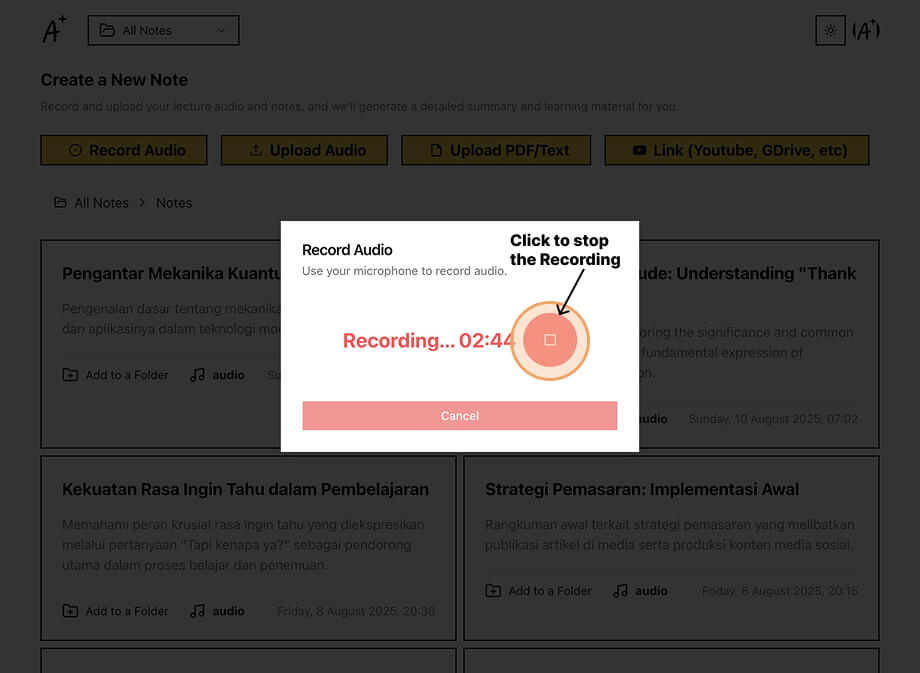
- NoteSpark AI will start recording your lecture audio. You will see the recording progress in the popup and do not close the popup.
- You can stop the recording by clicking the Stop button.
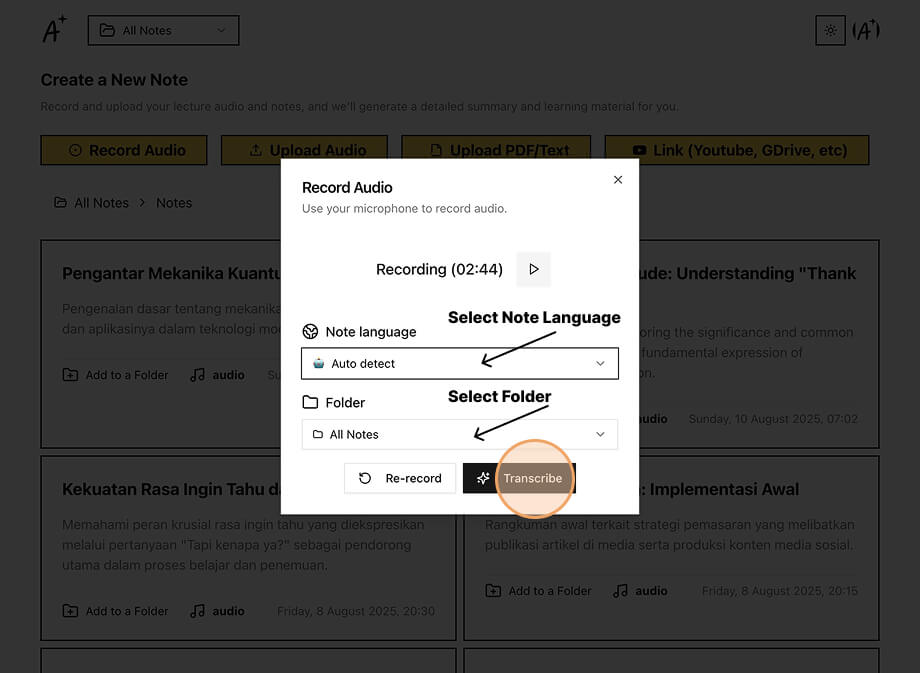
- After stopping the recording, you can listen to your audio by using the playback controls, choose your preferred Note Language or keep it as Auto Detect, select which Folder to store your lecture notes in, and when you're satisfied, click the Transcribe button to process your recording.
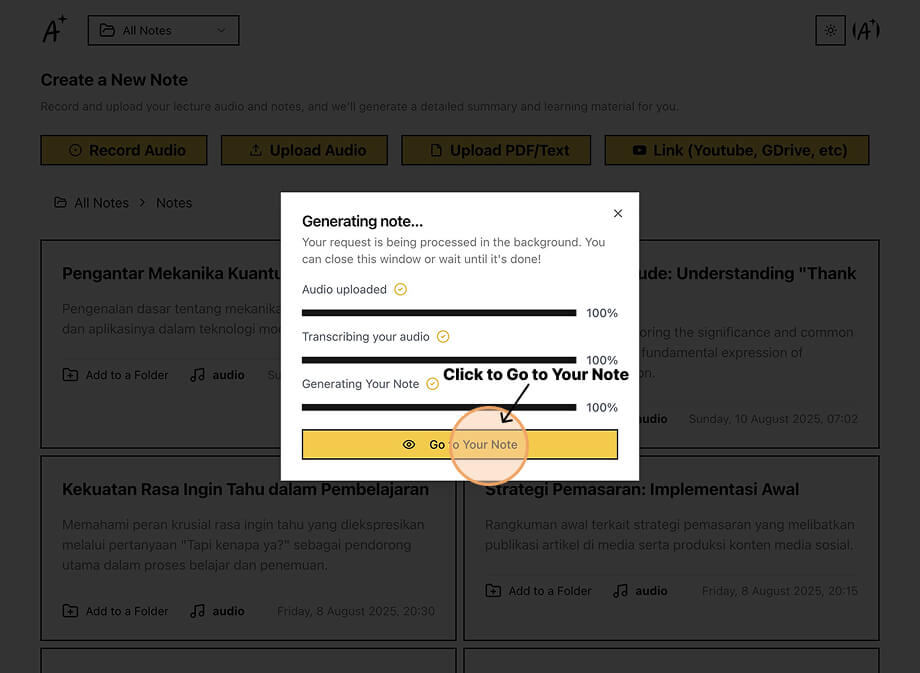
- Wait for the transcription to complete.
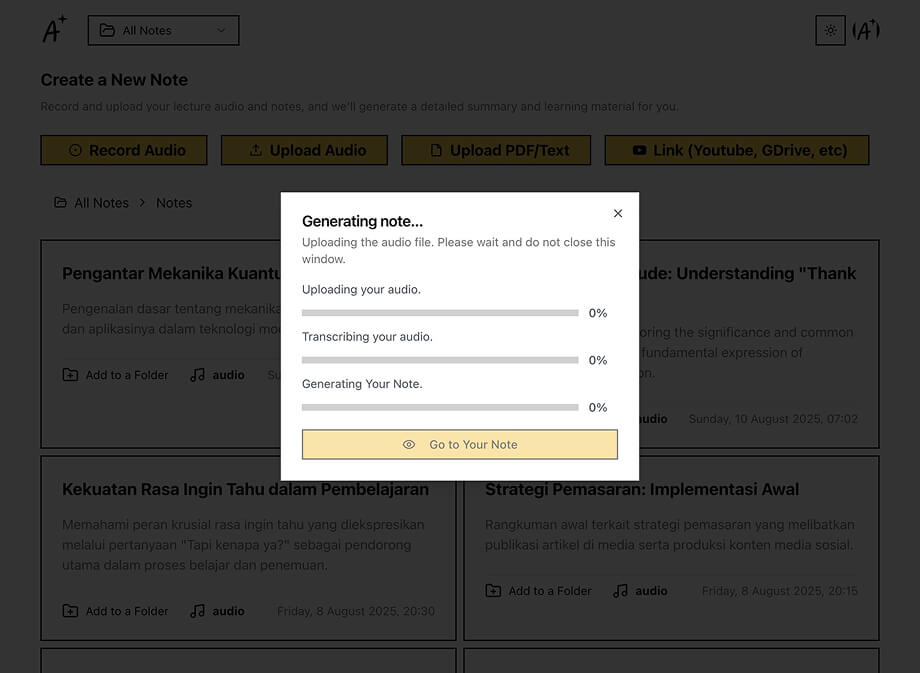
- After the transcription is complete, You can click Go to Your Note to view your note.
- Your note is now ready to view in Cornell Note format. You can explore additional study methods from the note menu, including Quiz, Flashcard, Mindmap, or use the Ask the Note feature to get answers based on your content.
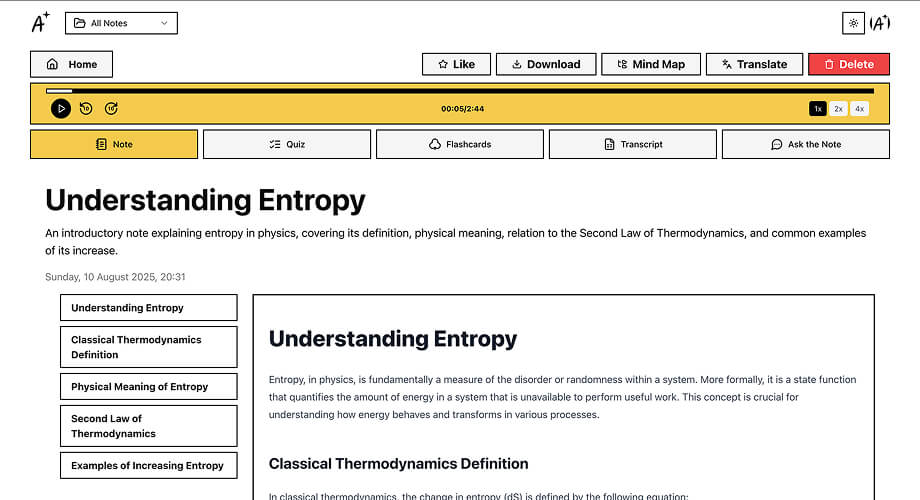
Your Note is Ready
Now you can create flashcards, quizzes, mind maps, and interact with your content

